Secure Pay |

|

|

|

|
|
Secure Pay |
|
|
|

|
Secure Pay |
|
|
|
|
|
Secure Pay |
|
|
|
|
|
|
||
Secure Pay is a payment gateway, a secure connection between your business, card providers and banks. It allows you to accept payments online, over the phone and via direct entry (recurring electronic debit and credit payments) in a highly secure, PCI DSS compliant manner.
How does it work?
All payments made through Your Website will be processed on instant:
When Your Website booking is made Resonline collects the payment details and instructs Secure Pay gateway to collect full or partial payment from the guest's credit card (accordingly to your Booking Policies)
In this article you will find out how to:
•Link your Secure Pay account to Resonline
•Process manual payment through Secure Pay
•Process additional payment to your booking using Secure Pay
•Set up different access level for users in your Secure Pay account
How to Sign up with Secure Pay?
It's easy!
To sign up go to: https://securepay.com.au/sign-up/?referrerid=JDB - and click on the "Create your SecurePay account now" button.
On the next page fill out and submit the form.
The SecurePay Support Team will lead your though the process from here.
Once completed, you will be given the following details necessary to link your Room Manager to the SecurePay account:
•Merchant ID
•Merchant (Transaction) Password
You can now link your Secure Pay account to Resonline
How to link a Secure Pay account to ResOnline?
Once your Secure Pay account is created and you have your Secure Pay transaction and login details you can link it to your Resonline account:
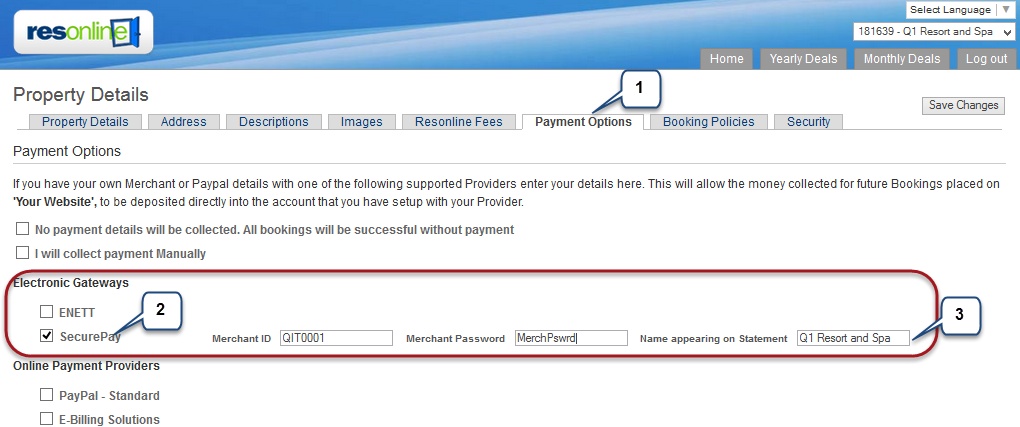
1.Login to Resonline, go to Property Details section and select Payment Options tab
2.Under Electronic Gateways select the box next to the Secure Pay option
3.New editable fields will appear - Enter Your Details supplied to you by your payment gateway provider.
- Merchant ID - enter full Merchant ID - this usually contains 3 letters and numbers (i.ex.: QIT0001)
- Merchant Password - enter your Live Transaction Password
- Name Appearing on the Statement - enter your property name exactly how it is visible on the Secure Pay confirmation email or inside the Secure Pay account
4.Save changes
We highly recommend that you process a test payment immediately after connecting your ResOnline to Secure Pay. Simply make an online booking on your Book Now button and check the Secure Pay account to ensure that the funds were collected.
How to process a manual payment through Secure Pay
Secure Pay account can serve as a merchant facility allowing you to process payment manually by entering your guest's credit card or a Virtual Credit Card into the system.
Here is how to proceed:
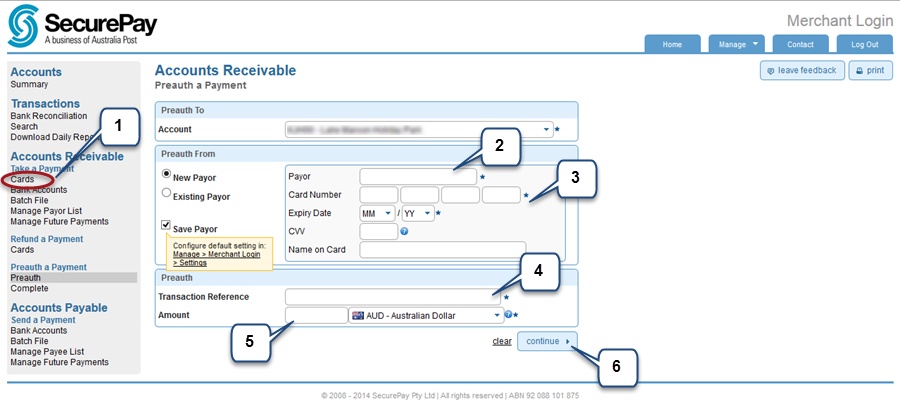
1.Log in to Secure Pay and click on Cards option on the left menu
2.Payor: you can select an existing payor or enter a new payor number - this could be any number unique for this guest (it will help you find the payor details for any future transactions).
3.Enter credit card number, expiry date and the name appearing on the card. Note that the CVV is not required
4.Transaction Reference - enter any number here to create your transaction reference ID. This number will be unique for this transaction only (i.ex.:booking ID)
5.Enter amount you would like to charge - make sure your mount is decimal (i.ex.: 50.00)
6.Click Continue
How to process additional payment for exiting booking with Secure Pay payment
If you collect the deposit at the time of booking (see Booking Policies) or the booking was amended and you need to charge an extra amount manually, you can process an additional payment using the same credit card stored by Secure Pay. You can also remove the old cc number and enter new credit card details in your Secure Pay account.
Note: Those actions are not processed through Resonline - and will not update the Booking Details screen (Reports) with the new amount.
Here is how it works:
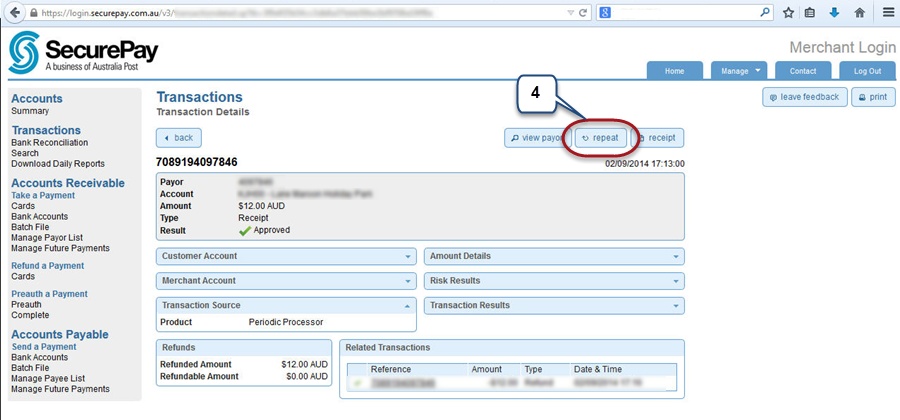
1.Log in to Secure Pay and click on Search link on the left menu to find your existing payment
2.Enter the search criteria and click Search button
3.Once you find the transaction click on the Transaction Reference Number
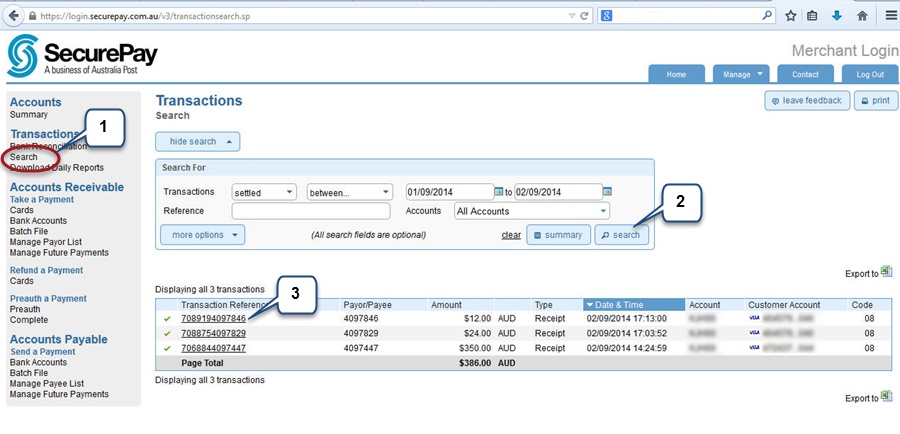
Details of your previous transaction will appear on the screen.
4.Click on the Repeat Button to make a new payment using the same credit card details
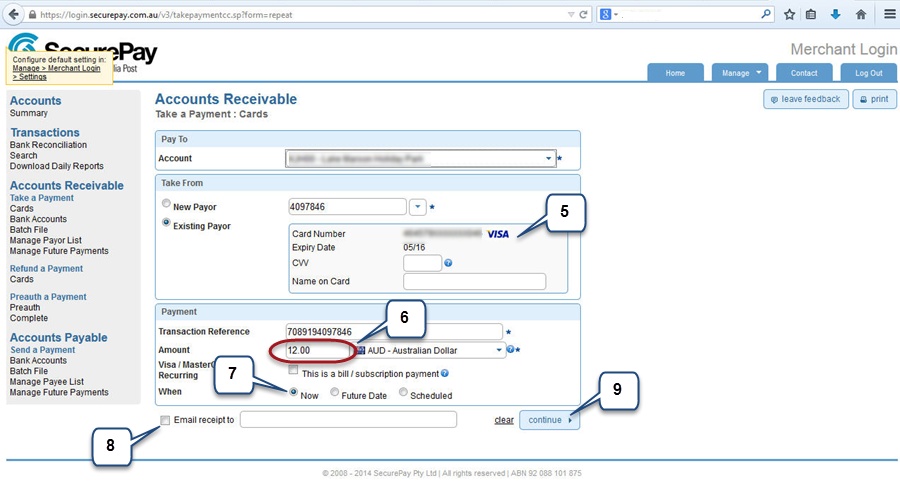
On the next screen:
5.The guest's cc details will be visible here
6.Enter the amount to charge
7.Choose if the payment needs to be processed now or scheduled for later
8.You can also send a receipt of this transaction to the guest or to yourself - simply tick the box to enable this option and enter the email address
9.Click on Continue button
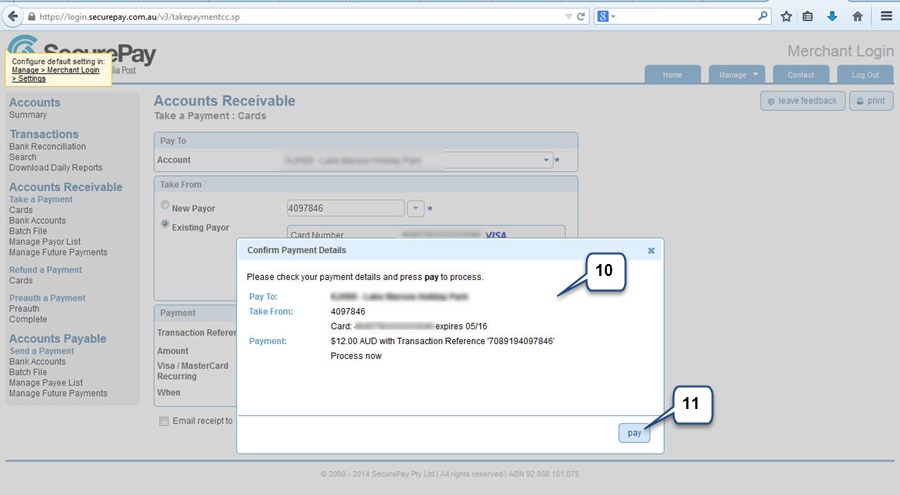
10. a pop up window will appear asking you to confirm the new payment details.
11. Click on Pay button once ready
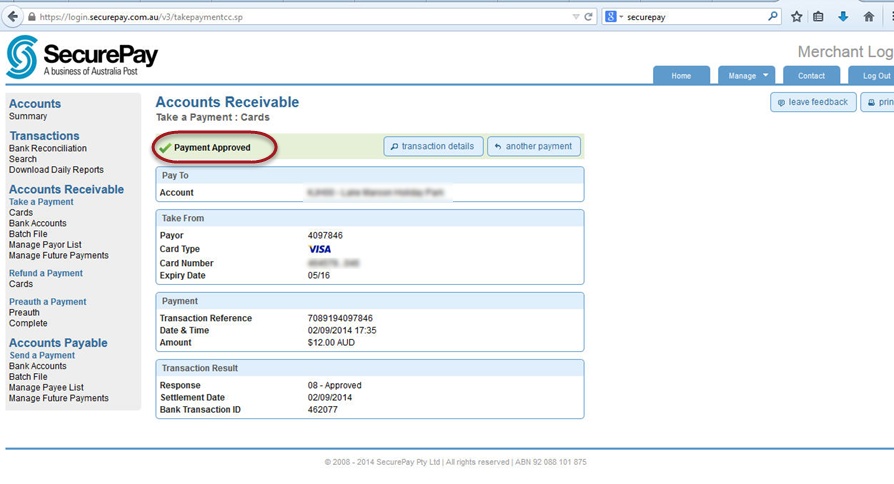
12. Once the payment is processed the receipt will be displayed on the screen with the payment processing status
How to set up different access level for users in your Secure Pay account
You can use your Secure Pay for different purposes, from payment processing to reporting and analytics.
You might want to create several users with their login details and assign a different Roles (access levels) to each of them. By default all users have a full access to all Secure Pays sections (ADMIN Role).
To start create your Roles to create access levels:
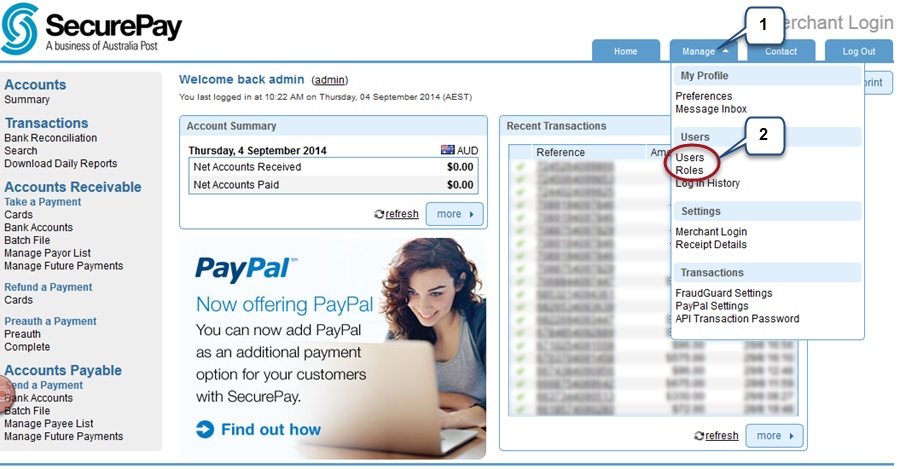
1.Log in to Secure Pay and click on Manager option on the top menu
2.Select Roles
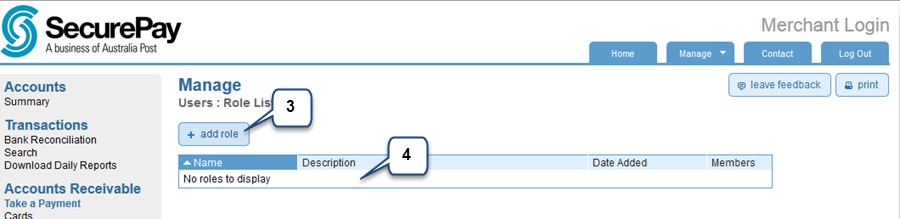
3.Click on Add Role button to create new access level
4.Already created Roles will appear on the list here
5.Add Role: Select which parts of Secure Pay account will be accessible for this Role
6.Enter the Role's name - this will help you identify the access level
7.Description - this field is optional
8.Select which parts of Secure Pay account will be accessible for this Role - tick boxes that correspond to the Secure Pay account sections

9.Once done - click Save button at the bottom of the screen
Now you can create a User and attach a Role to it
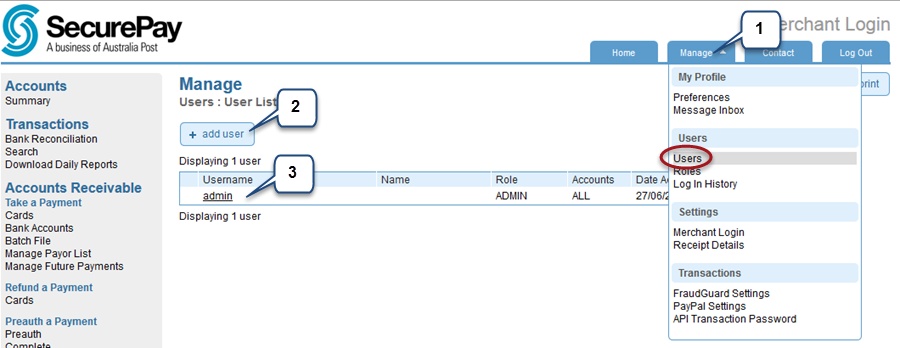
1.On the top menu click on Manager option and select Users
2.click on Add User button to add new User
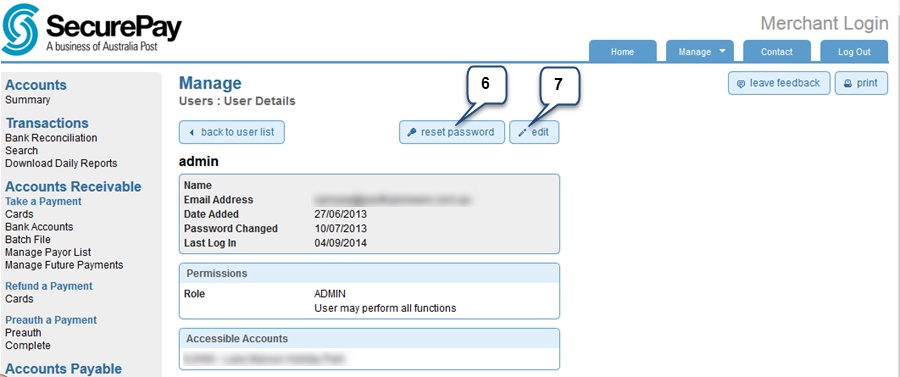
3.or click on the existing Username to edit this entry's details (resetting password, assigning permissions - Roles)
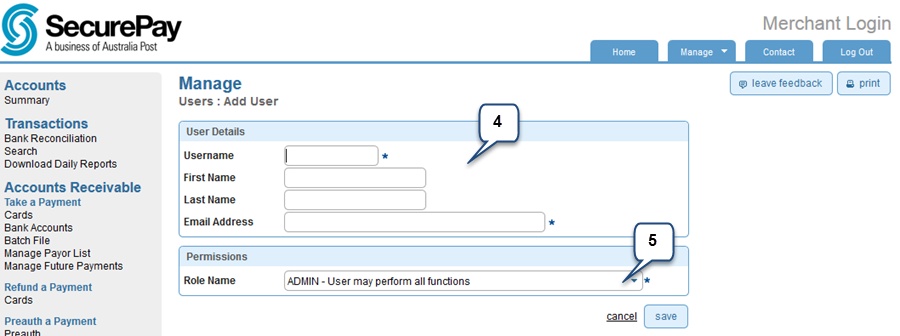
4.Enter new user's details
5.Select access level for this user (Role) - click on a drop down list to select one of your previously created Roles
Once you create a user:
6.You can reset the User's password
7.Or edit other details like email address or Role